Support Forum
Mail : Configuring Outlook : IMAP


Need another E-Mail account activated? E-Mail Us!
We recommend you print this page to refer to while configuring Outlook.
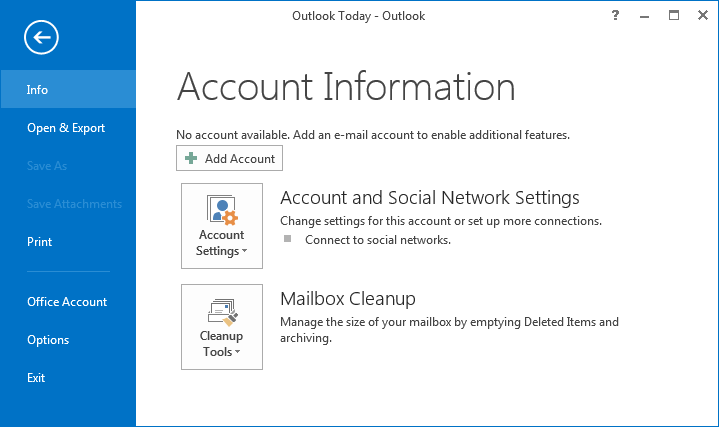
Step 1.
After loading Outlook 2013, click on File and then click on Add Account:
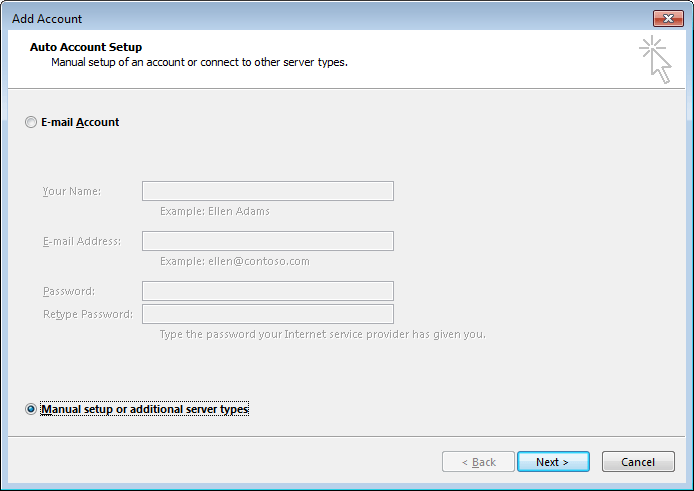
Step 2.
Select "Manual setup or additional server types" and click "Next":
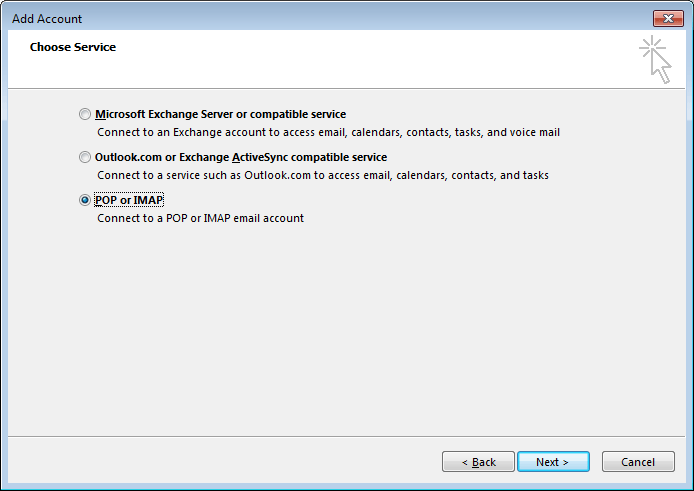
Step 3.
Select "POP or IMAP" and click "Next":
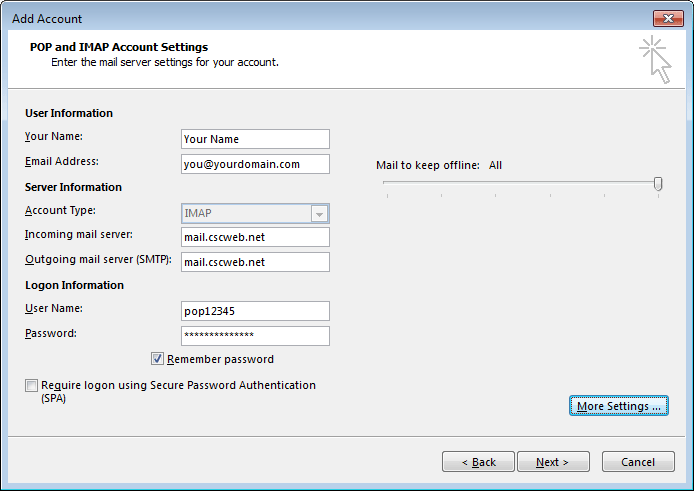
Step 4.
Fill out the fields and click "More Settings" before you continue.
- Enter your full name, your e-mail address at your domain, your "pop#####" login name and the password for your account.
- Choose "IMAP" for Account Type.
- Make sure the "Remember password" box is checked (for convenience).
- Your "Incoming mail server" is mail.cscweb.net
- The "Outgoing mail server" is also mail.cscweb.net
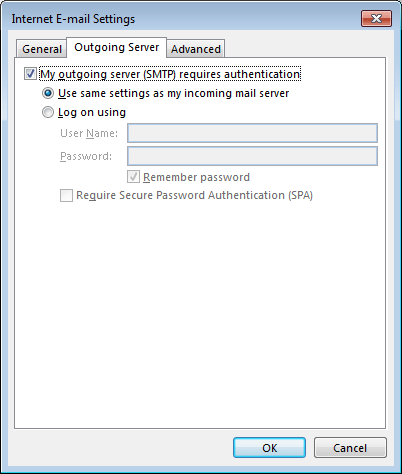
Step 5. - More Settings / Outgoing Server Tab (continued from Step 4):
Turn on "My outgoing server (SMTP) requires authentication". The same settings as incoming server is fine:
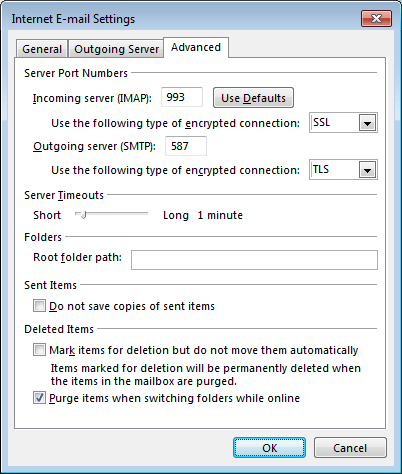
Step 6. - More Settings / Advanced Tab (continued from Step 4):
Enable SSL for incoming / IMAP connection on port 993, and TLS for outgoing / SMTP connection on port 587. The remaining defaults are OK:
Step 7.
Return to the Account Settings screen by clicking on "OK" from the advanced tab. Then click "Next":
Outlook 2013 will attempt to connect for both send and receive. If configuration is successful, you will see:
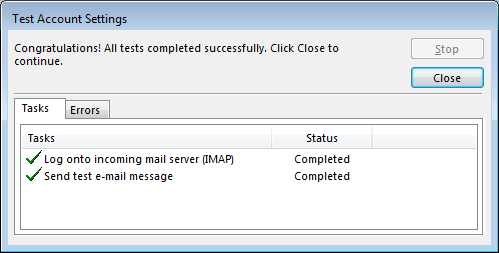
Congratulations, your e-mail account is now configured!
Return to E-Mail Help
|